Pendulum Boards
By Tabitha Chamberlain
I made one of these over Samhain last year. Never making one, I didn't really have much knowledge of what I was getting into when I did it. I just knew that it was going to be my project for that year's Samhain. I guess I should mention that I generally take vacation over what is traditionally known as Halloween and spend time making something. Usually it was baking, but last year I decided I wanted to do something completely different.
Pendulum boards can be rather simple or very complex. Spend time looking at images of different types of boards before deciding on which one you want to use. If you want to use a more complex board you may want to order or print out an image.
Materials:
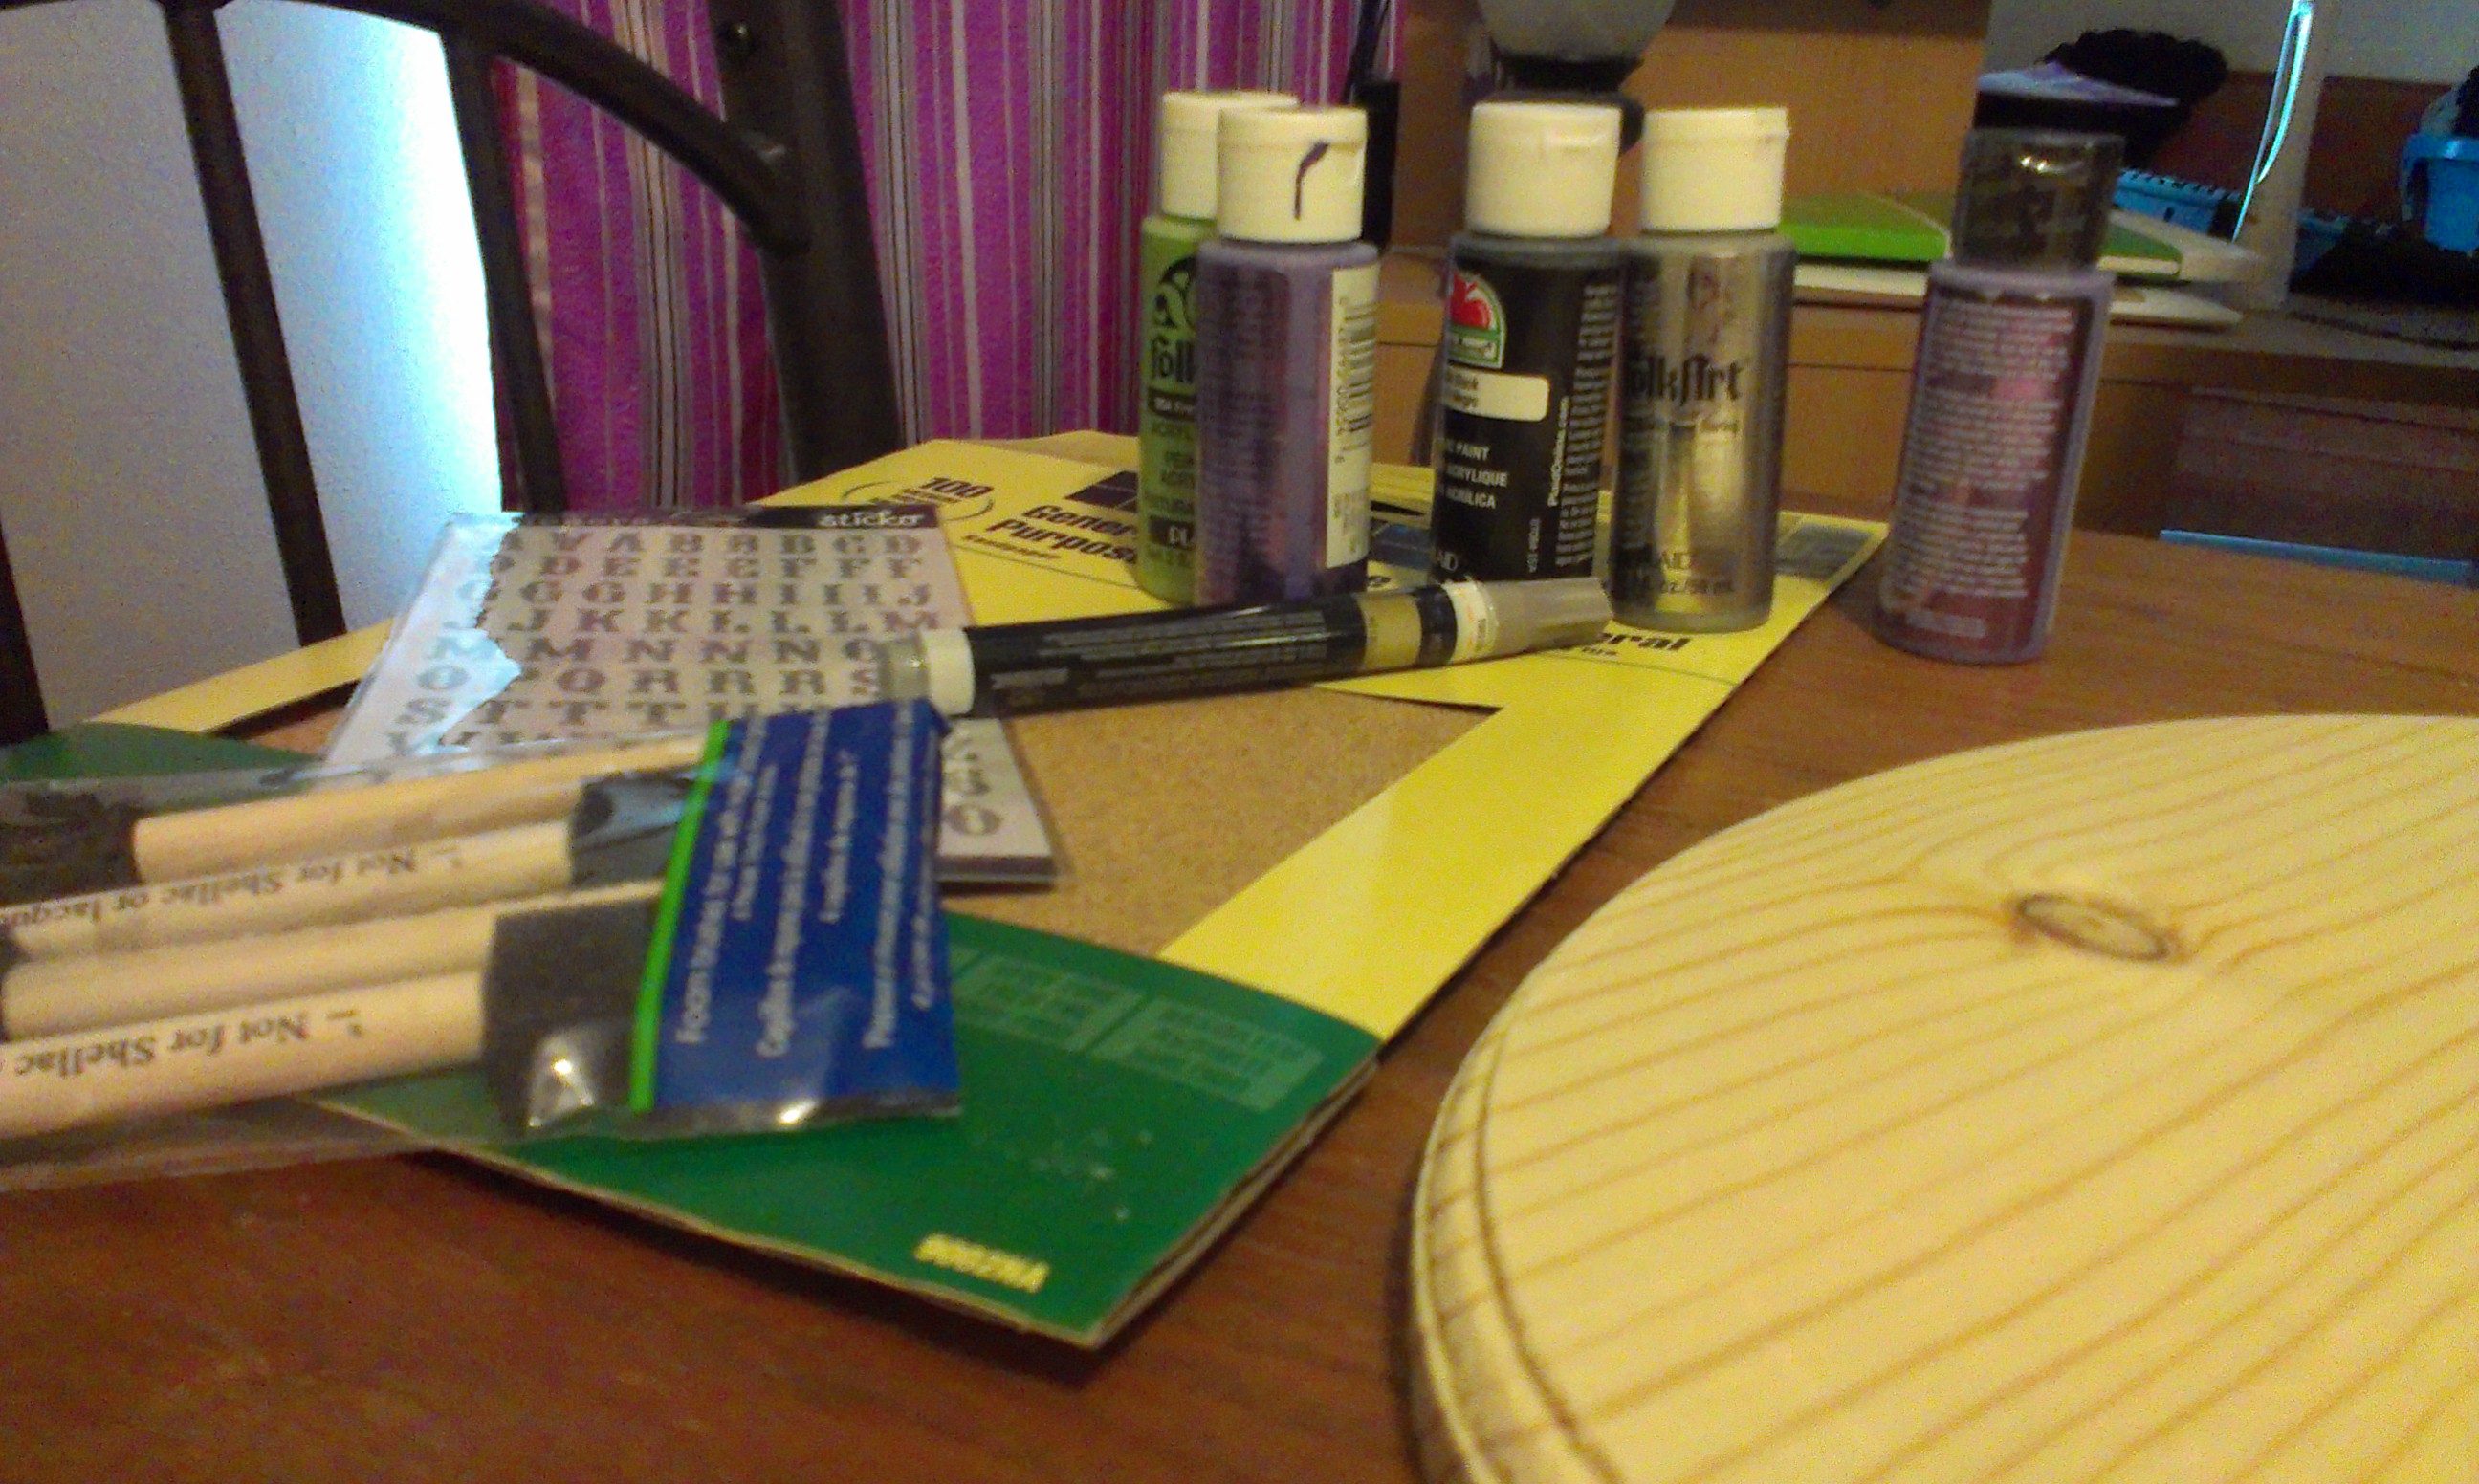
-wood board (craft stores)
-paint
-sealer
-stickers
-paint pens
-image
-sandpaper
-foam brushes
Start by sanding down your board. If you feel that a different material is better fitting for a base please use that. However just keep in mind the material of your pendulum, if yours is metal you don't want something that has magnetic qualities as it will throw off your readings.
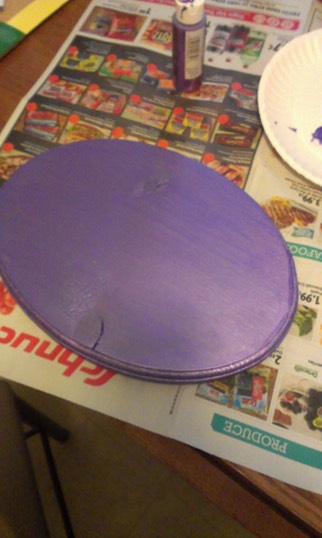
Once the board is well sanded, wipe off excess sand dust with a damp cloth. Once the board is prepped start painting it in the color of your choice. If you want a more rustic look use less paint, but don't use the foam brush, as it will add a thick layer of paint on the board. Maybe wipe on the paint with crumpled newspaper which will allow the wood to show more.
Let this dry for a day or two, some wood will absorb more paint than others so by letting it sit you'll see if you need to add more paint. You can sand if you feel the paint is too heavy.
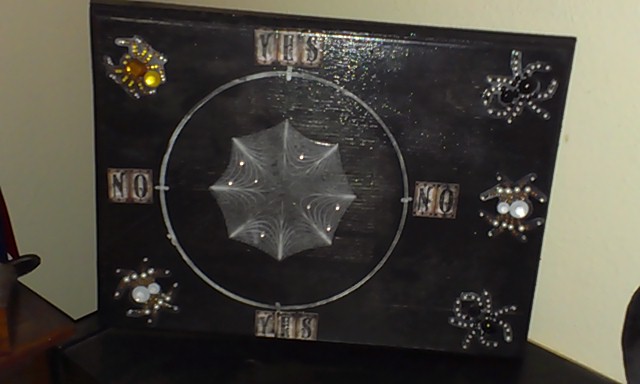
For myself, I can't draw or paint freehand, I used a small plate to draw a circle than a ruler for the cross of a basic yes/no pendulum board with a silver paint pen. Silly? Yes, but if I can do this than anyone else can too.
The yes/no images are actually scrapbook stickers (You may notice I use a lot of these for crafts other than scrapbooking, which ironically I have no interest in). You can write yours in fancy lettering, or use symbols. You can also do one with cardinal directions: North, South, East, West. Maybe even the Zodiac.
If you decide you want to use a more complex image that you've printed off; you "age" the white paper by staining it with strong tea or coffee and CAREFULLY burn the edges with a lighter or match (use heavy card stock for this option). Just let it dry well before trying to glue it down with Modge-Podge.
You can add extra details by freehand drawings or more stickers. Either way once you feel you've finished your board make sure to spray it heavily with sealer this is to keep all of the stickers and paint from peeling and chipping off. It will also make it easier to wipe off the dust or dirt if you keep it out like I do mine.